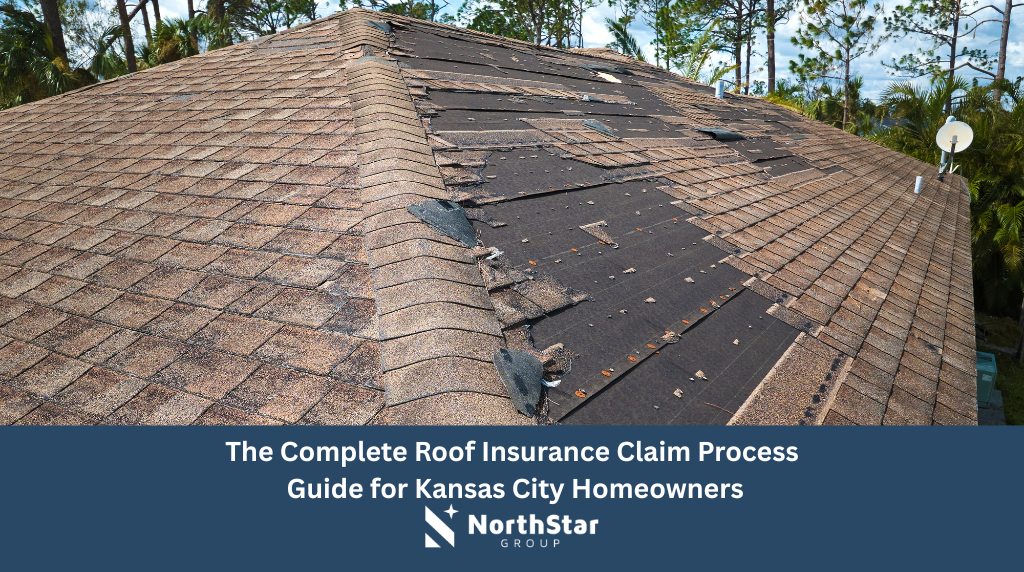
When severe weather strikes Kansas City—bringing hail, high winds, or torrential rain—your roof bears the brunt of the damage. But knowing your roof is damaged is only the beginning. What comes next can be confusing, overwhelming, and costly if you don’t understand the process.
Filing a roof insurance claim doesn’t have to be complicated—but it does require understanding the steps, knowing your rights, and having the right documentation. Many Kansas City homeowners who file without professional guidance leave significant claim value on the table simply because they don’t know how the system works.
At NorthStar Group, we’ve helped Kansas City homeowners recover over $100 million in storm damage claims. In this complete guide, we’ll walk you through every step of the insurance claim process—from the moment you suspect damage to the day you receive your settlement.
Step 1: Assess the Damage (Within 24-48 Hours After the Storm)
The clock starts ticking the moment a storm passes through Kansas City. Here’s what you need to do immediately:
What to Do First
- Document the Storm Date and Time: Write down when the storm occurred. Your insurance company will need this information.
- Safety First: Don’t climb on your roof if it’s wet, icy, or unstable. Take photos from the ground and wait for professional assessment.
- Check for Visible Damage: Look for missing shingles, dents in gutters or vents, damaged siding, or debris on the roof.
- Take Photos and Videos: Document everything you can see from ground level. Include wide shots of your entire property and close-ups of any visible damage.
- Check Your Attic: Look for water stains, daylight coming through the roof, or wet insulation—all signs of roof damage.
Schedule a Professional Storm Property Check
Here’s the critical first step most homeowners skip: Before you call your insurance company, before you call a roofer, you need a professional Storm Property Check.
Why? Because a standard roof inspection and a storm damage assessment are completely different:
- A roof inspection tells you the condition of your roof
- A Storm Property Check documents damage in a way insurance companies are legally required to acknowledge
At NorthStar Group, our Storm Property Check includes:
- Complete roof assessment using industry-standard protocols
- Detailed photo documentation from multiple angles
- Identification of hidden damage (granule loss, seal damage, compromised flashing)
- Assessment of policy deadline risks
- Clear guidance on whether filing a claim is in your best interest
Best of all? If we don’t find legitimate storm damage, you owe nothing.
Step 2: Review Your Insurance Policy (Before You File)
Before you pick up the phone to call your insurance company, take 30 minutes to understand what you’re actually covered for. This step alone can prevent claim denials and ensure you receive your full entitled coverage.
Key Policy Elements to Understand
- Deductible Amount
Your deductible is what you pay out of pocket before insurance covers the rest. In Kansas City, standard deductibles vary, but hail and wind deductibles are often calculated as a percentage of your home’s insured value (typically 1-2%).
Understanding your deductible amount helps you know what to expect when you receive your settlement.
- Replacement Cost Value (RCV) vs. Actual Cash Value (ACV)
This is CRITICAL and most homeowners don’t understand the difference:
- Replacement Cost Value (RCV): Pays to replace your roof with materials of similar kind and quality at today’s prices. You receive the full cost of replacement.
- Actual Cash Value (ACV): Replacement cost MINUS depreciation based on the age and condition of your roof. This results in a significantly lower payout.
Most Kansas City homeowners have RCV policies, but check your declarations page to be sure.
- Recoverable Depreciation
Even with RCV coverage, most insurance companies pay claims in two parts:
- Initial Payment: ACV amount (replacement cost minus depreciation, minus your deductible)
- Final Payment: Recoverable depreciation paid after you complete repairs and submit receipts
This is why you need to actually complete the repairs—if you don’t, you only receive the depreciated amount, leaving substantial money on the table.
- Coverage Limits and Exclusions
Check for:
- What perils are covered (hail, wind, fire, etc.)
- Any exclusions (wear and tear, age-related deterioration, cosmetic damage)
- Deadlines for filing claims
- Code upgrade coverage (for bringing your roof up to current building codes)
Step 3: File Your Claim (The Right Way)
Once you’ve confirmed damage and reviewed your policy, it’s time to notify your insurance company. Here’s how to do it correctly:
How to Contact Your Insurance Company
- Call the Claims Department
Call the number on your insurance card or policy documents. Tell them:
- The date and time of the storm
- The type of damage you’ve observed
- That you’d like to file a claim for roof damage
IMPORTANT: Keep it factual. Say ‘I have damage to my roof from the storm on [date]’ rather than ‘I think I might have some damage.’ Confidence matters.
- Get a Claim Number
Your insurance company will assign a claim number. Write this down—you’ll need it for all future communications.
- Ask About the Next Steps
Find out:
- When an adjuster will be assigned
- How long scheduling the inspection typically takes
- Whether you need to be present for the inspection
- What documentation they need from you
What NOT to Say When Filing
- DON’T say: ‘I’m not sure if the damage is from this storm or an older one’
- DON’T say: ‘My neighbor thinks I should file a claim’
- DON’T say: ‘I already had a roofer fix some of it’
Stick to the facts. Be confident but not speculative.
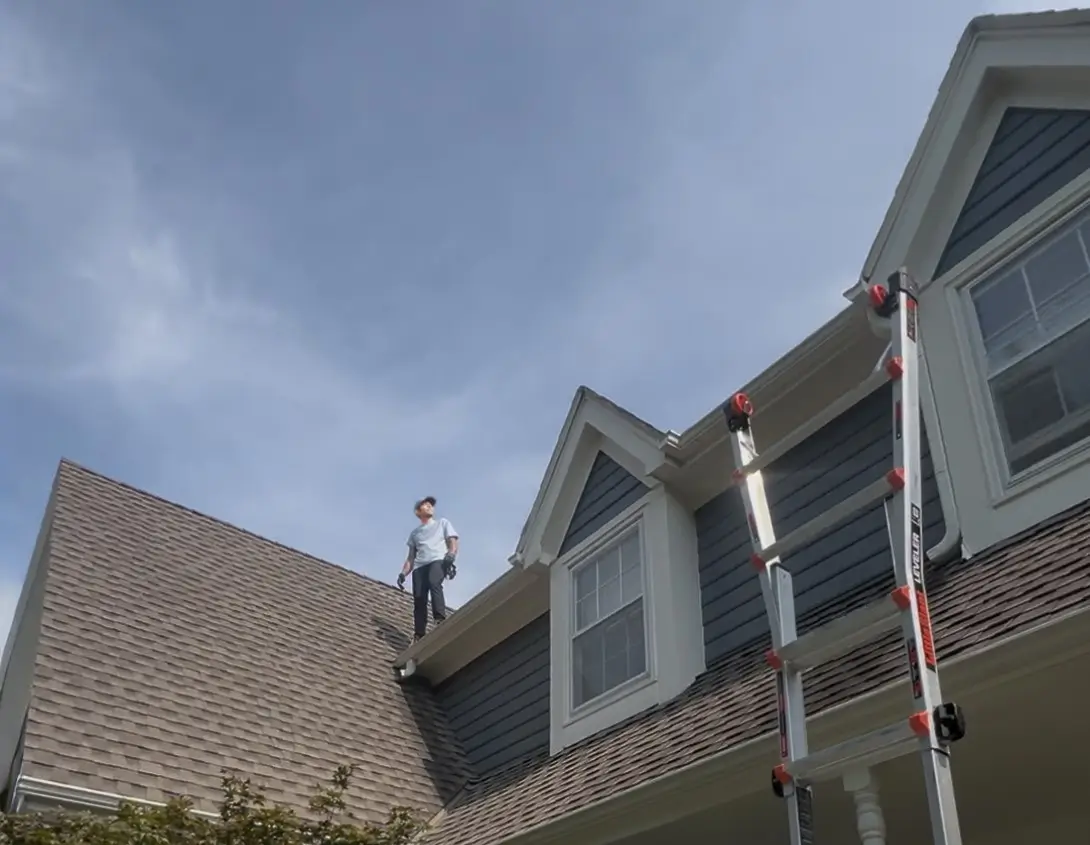
Step 4: The Insurance Adjuster Inspection
This is the most critical phase of your claim. What happens during the adjuster’s inspection determines how much compensation you receive—or whether your claim is approved at all.
What to Expect
The insurance company will send an adjuster to inspect your property, typically within 5-10 business days (sometimes faster after major storms). The adjuster will:
- Climb on your roof to examine damage
- Take photos and measurements
- Check gutters, vents, flashing, and other components
- Document the age and condition of your roof
- Determine if damage is storm-related or pre-existing
The Single Most Important Thing You Must Do
Never let the insurance adjuster inspect your property alone.
Here’s why: Insurance adjusters work for the insurance company, not for you. Their job is to protect the insurance company’s bottom line by minimizing payouts. They’re trained to:
- Miss non-obvious damage
- Classify functional damage as ‘cosmetic’
- Attribute storm damage to ‘normal wear and tear’
- Focus on what’s NOT damaged rather than what IS damaged
You need someone on YOUR side during the inspection. At NorthStar Group, we meet with your adjuster on-site at no cost to you. We ensure:
- All damage is properly documented
- Nothing gets missed or overlooked
- Improper classifications are challenged immediately
- The scope of work is complete and accurate
This single step can significantly increase your claim payout. Learn more about our insurance claim assistance services.
Step 5: Review the Estimate (And Negotiate If Needed)
After the inspection, your insurance company will send you an estimate (also called a ‘scope of work’). This document details:
- What damage they’re covering
- What they’re NOT covering (and why)
- The estimated cost of repairs or replacement
- Your deductible amount
- How depreciation was calculated (if ACV policy)
Red Flags to Watch For
- Underestimated Square Footage: If they’re estimating a smaller roof area than what you actually have
- Missing Line Items: No mention of gutters, vents, flashing, or other components that were damaged
- Partial Replacement: They want to replace only certain sections when the entire roof is damaged
- ‘Cosmetic Only’ Determination: All damage classified as cosmetic with no functional impact
- Unrealistic Material Costs: Estimates using outdated pricing or inferior materials
You Have the Right to Negotiate
The first estimate is rarely the final number. Most Kansas City homeowners don’t realize they can—and should—negotiate with their insurance company.
If the estimate seems incomplete or inaccurate:
- Request a Line-by-Line Explanation: Ask the adjuster to explain each item and how they calculated costs
- Get an Independent Assessment: Have a professional like NorthStar Group review the estimate
- File a Supplement: If damage was missed or costs underestimated, you can submit a supplemental claim with additional documentation
- Request a Reinspection: If significant damage was overlooked, ask for a second inspection
Step 6: Receive Your Payment
Once your claim is approved and the estimate is finalized, you’ll receive payment. Understanding how insurance payments work is crucial:
How Insurance Pays Claims
For RCV (Replacement Cost Value) Policies:
- First Check: Actual Cash Value (total cost minus depreciation, minus your deductible)
- Second Check: Recoverable depreciation paid after you complete repairs and submit paid invoices
The Two-Part Payment Process:
Most insurance companies will send you an initial payment based on the depreciated value of your roof. After you complete the repairs and provide documentation, they’ll release the remaining depreciation amount. This ensures the work actually gets done and protects both you and the insurance company.
To receive the full payment, you must:
- Complete the repairs within the policy timeframe (usually 180-365 days)
- Submit paid invoices and proof of completion
- Provide before/after photos
- Submit a Certificate of Completion from your contractor
Step 7: Complete the Repairs
Once you receive your initial payment, you can begin repairs. Here’s what to know:
Choosing a Contractor
You are NOT required to use the insurance company’s preferred contractor. You have the right to choose any licensed, insured contractor you want.
Look for contractors who:
- Are local to Kansas City (not storm chasers from out of state)
- Have experience with insurance claims
- Are properly licensed and insured
- Provide references from recent projects
- Offer warranties on their workmanship
Timeline Expectations
Typical timeline for roof replacement in Kansas City:
- 1-2 weeks: Scheduling and material ordering
- 1-3 days: Actual roof replacement work
- 1 day: Final inspection and cleanup
After major storms, timelines can be longer due to high demand. Book early to avoid delays.
Complete Timeline: From Storm to Settlement
Here’s what to expect from start to finish:
| Timeframe | What Happens |
| Day 0 | Storm occurs – document date and visible damage |
| Day 1-2 | Schedule Storm Property Check, review insurance policy |
| Day 3-5 | Professional inspection completed, file claim with insurance company |
| Day 7-14 | Insurance adjuster inspection (with your advocate present) |
| Day 14-21 | Receive and review insurance estimate, negotiate if needed |
| Day 21-30 | Claim approved, receive initial payment (ACV) |
| Day 30-45 | Schedule contractor, order materials, complete roof replacement |
| Day 45-60 | Submit completion documentation, receive final payment (recoverable depreciation) |
Common Questions About the Roof Insurance Claim Process
How long do I have to file a claim after storm damage?
In Kansas, you generally have two years from the date of loss to file a claim. However, your specific insurance policy may require you to notify them much sooner—sometimes within 60-90 days. Check your policy’s notification requirements and don’t wait. The sooner you file, the easier it is to prove the damage occurred during a specific storm event.
Will my insurance rates go up if I file a claim?
It depends on several factors: your insurance company’s policies, your claims history, whether the damage was from a widespread weather event (like a major hailstorm affecting many homes), and state regulations. In Kansas City, when large storms affect entire neighborhoods, companies are less likely to raise individual rates because the damage was due to an ‘Act of God’ rather than negligence.
Can I use any contractor I want?
Yes. Despite what some insurance companies might suggest, you are NOT required to use their ‘preferred contractors.’ You have the legal right to choose any licensed, insured contractor you want. At NorthStar Group, we work with all insurance companies and ensure you receive the full compensation you’re entitled to under your policy.
What if my claim is denied?
Don’t give up. Many initial denials are overturned on appeal. Common reasons for denial include: insufficient documentation, missed deadlines, pre-existing damage claims, or improper classifications. If your claim is denied, request a detailed explanation in writing, get an independent professional assessment, and file a formal appeal with additional evidence. In some cases, hiring a public adjuster or attorney may be necessary.
Get Expert Help With Your Kansas City Roof Insurance Claim
The roof insurance claim process doesn’t have to be overwhelming. With the right knowledge, documentation, and professional support, you can navigate it successfully and receive the full compensation you deserve.
At NorthStar Group, we’ve spent over 20 years helping Kansas City homeowners maximize their storm damage claims. We know the system, we know what insurance companies look for, and we know how to ensure you receive every dollar you’re entitled to.
Our No Obligation Storm Property Check includes:
- Professional damage assessment and documentation
- On-site representation during insurance adjuster inspections
- Estimate review and negotiation support
- Deadline tracking to protect your claim rights
- Full claim management from start to finish
And if we don’t find legitimate storm damage? You owe nothing.
Schedule your free Storm Property Check today and protect your home and your investment.